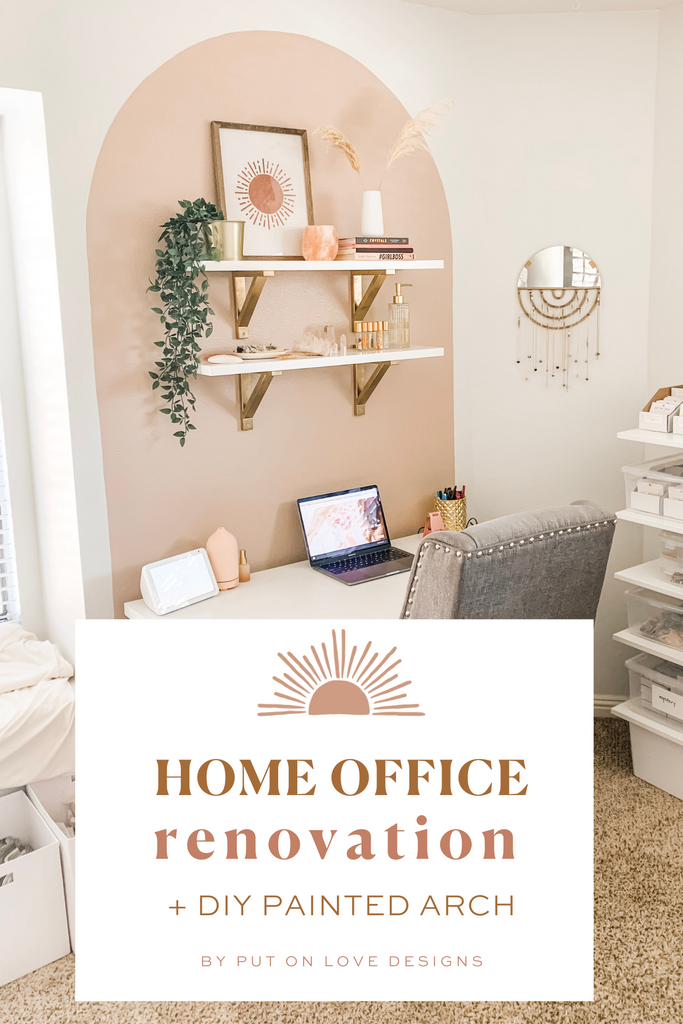
Before & After: Home Office Renovation (DIY Wall Arch + Ikea Shelf Hack)
Share
From an organizing overhaul to the wall arch focal point, here’s the full scoop!
 For years my office has served me well, but she was ready for a facelift!
With our big rebrand, I wanted my place of inspiration and creativity to reflect my new vision. The room still had a lot of the blues that used to be our colors, and I wanted to update the space with warm, bright naturals.

The office also needed some serious decluttering and deep cleaning. So while we were at it, I reorganized with storage solutions my little Enneagram-Three heart had been craving.
Since business couldn’t be put on hold for the renovation, the project took us nearly HALF A YEAR. We put so many hours into this baby, and it was worth every minute! I feel so excited and inspired every time I set foot in this creative space.

The thing that kicked me into gear with the renovation was creating a dedicated order-filling station.
I wanted a space that was always clear for packing up a quick order or where a bunch of orders could be filled easily and efficiently. Now I have a clean desk with all my packing supplies handy right underneath, extra storage in the side cart, and a visually pleasing and clearly labeled organization system!
 SHOP THE LOOK
Ikea Shelves spray painted gold
Leather Strap with wooden dowel
Ikea and Container Store Bins in the closet

My favorite part of the whole room (and the one that gave me the most trouble—if you follow me on social media you might remember the fiasco of the uncentered shelves…) is the arch that makes a gorgeous focal point for the room.
To create the arch, I first measured where I wanted the center of the arch to land on the wall and marked that center point with a pencil.
From the center point I measured out the radius I wanted for the arch. I then tied a string around a pencil and cut the string to the length of the radius. I taped the end of the string to the center point and used the pencil on the other end to draw a circle.
I finished the arch outline by drawing a straight line down from either side of the circle using a laser ruler. Final step, I added two coats of paint!
The straight lines down were the hardest part for me. Even though I used a laser ruler, the window frame on one side of the arch didn’t have a straight edge and the corner wall on the other side wasn’t perfectly straight, either. So I’ve learned to embrace the imperfections. In the end it didn’t take away from the fabulous look of the arch!
 SHOP THE LOOK
Paint Color: Sherwin Williams™ HGSW3056 Classic Beige
Ikea Shelves with brackets spray-painted gold
Whimsy & Wellness Roller Bottles : Wild Things Set of 3
Whimsy & Wellness Roller Bottles : Phase Rollers Set of 5
Whimsy & Wellness Iridescent Gold Dispenser for my carrier oil
Amazon White Vase
Books
Crystals: The Modern Guide to Crystal Healing
Whimsy & Wellness Book: Beyond Lavender
TJ Maxx Desk Chair (sadly I think it’s no longer available!)
 I needed plenty of room to keep all our products, and I knew I had to fit it all in a limited space. The shelving I used is the Ikea BOAXEL system, and with the Ikea Home Planner I was able to figure out just how I wanted to fit these in the room before putting them together. It was a super helpful tool, and the shelves were easy to assemble once the plan was laid out!
Here's what we had before

SHOP THE LOOK
Urban Outfitters Mirror (sold out) here's a similar one from Amazon
 It was a dream to create a workspace that inspires and motivates me! This home office is my happy place. Now it’s time to roll up my sleeves and have fun!


